
The fit was good but not ‘corseted’ enough. So last week I actually got together with my CAD designer Simon in the real world rather than trying to email directions and we edited the mannequin further. It’s much easier to say ‘push it in a bit more there’ than draw diagrams!
I also got my first CAD lesson so I could start to draft on the mannequin myself. Simon showed me what to do very slowly while I wrote furiously in a note pad, then I had a go, and another, and eventually got my head round it. This week I’ve been practising and managed a pattern of sorts (some wiggly lines!). Here’s how we got on in more detail…
Editing the mannequin
There were several edits we needed to make to our digital friend, namely taking in the waist. Once we got down to the measurements it turned out the waist didn’t need taking in quite as much as I’d first thought.
Mannequin changes
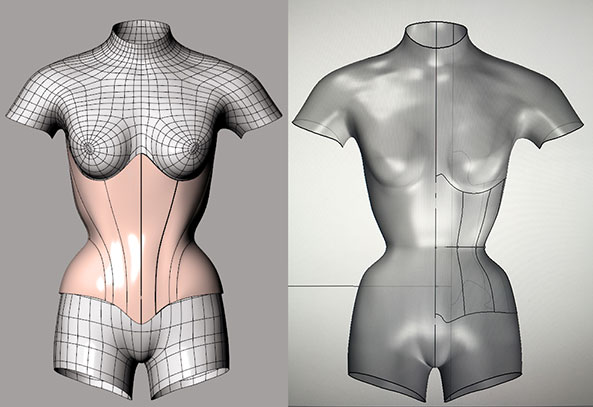
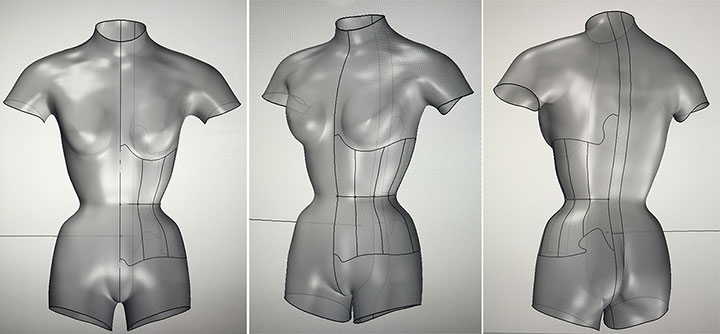
The rib area needed to come in too as we hadn’t really compressed this area as a corset would. Here you can see an image of the mannequin with it’s first pattern and compare its silhouette to the new version which has my own pattern drafting on. She now has the correct corset training proportions.
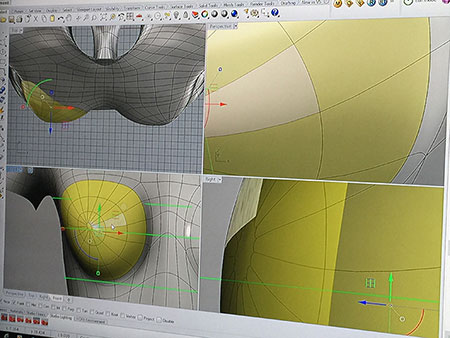
We then came up against the issue of the bust and how best to shape it for overbust corsets. The mannequin has quite prominent nipples which were leftover from one of the other programs she was part made in, they needed removing as well as a general pushing together, compressing and lifting of the bust to create the desired support and shape. This area is going to take a lot more work to get just right but she’s in safe hands!
Editing the mannequin to include a corseted bust
Learning To Pattern Draft Digitally
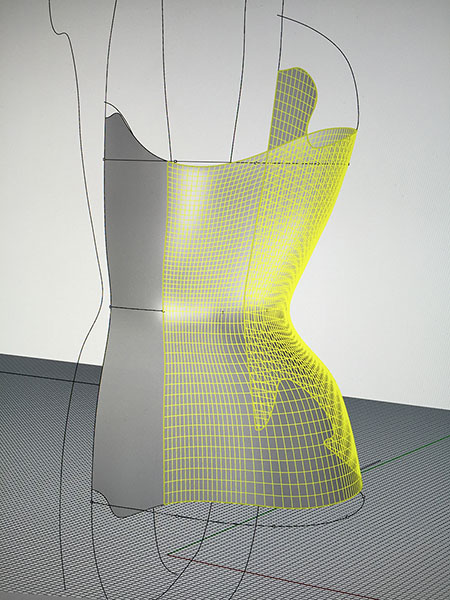
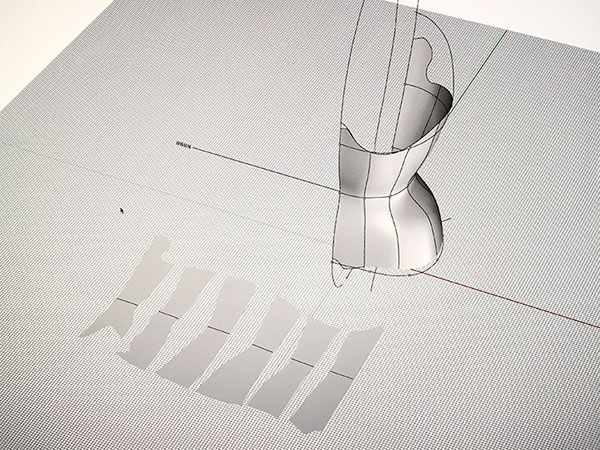
Splitting the surface using the seam lines I’ve drawn (or curves as they’re called)
Simon then gave me a crash course in Rhino, a CAD program I need to get my head round in order to make the magic happen. I was taught to make a curved surface, draw lines from a 2D view point, project them onto the surface, then use them to cut bits out and flatten them into pattern pieces. Then I was let loose on the mannequin itself. The whole process is amazingly complex and at the moment probably takes me about as long as drafting on a real mannequin, but hopefully as I progress it will get easier and much quicker.
My digital drafting skills also need work, I’ve been practising this week and managed this pattern finally but it’s not exactly perfect –
Design complete, now to flatten it!
Fruits of this weeks labour – A corset pattern finally!
I had some fun and went a bit skeletal, I couldn’t resist seeing how creative the software would let me be. So that at the back is meant to be a spine with a tail bone at the bottom. As you can see from the printout below (yes it printed correctly and everything, woop!) it all went a bit wiggly on pattern piece 5. If you check out the images above you can just about see the wiggly piece 5 on the mannequin back view, my eye for drafting digitally will improve as I get used to spotting issues on the screen. There’s also an issue with the back and front edges not being straight. The front is easily fixed with a ruler but the back will need to be cut and pivoted at the waistline. For now I can work round the issues, I’m not sure if I’ll correct the little wiggles or leave them to see how they come out but I’ll be making this up into a mockup. Stay tuned! 🙂
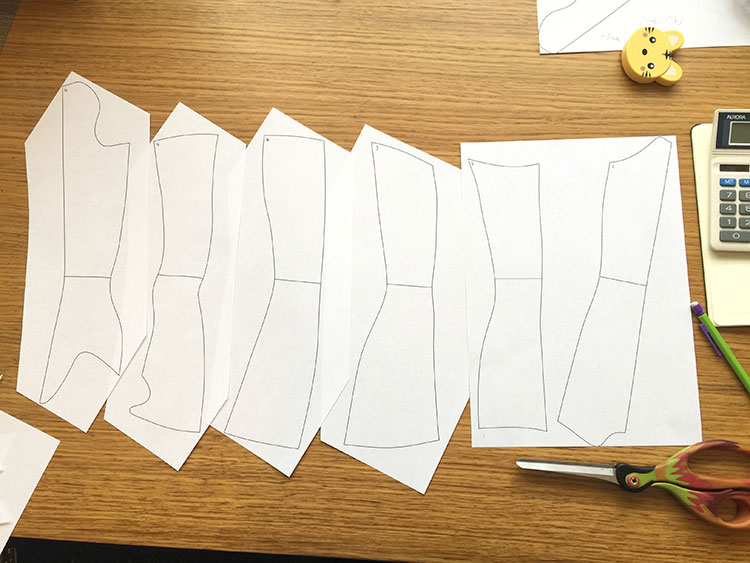
Printed corset pattern

Hi I am a tailor living in Brazil. My website: costureiro.com.br.
I make made-to-measure clothes using Rhinoceros 3D and this is the first time I found someone (outside of Russia) that uses Rhinoceros to make clothes.
I have one year experiencing this approach by now, this a very expensive way in terms of time, but results worth it. I think this is the future of making customized sewing patterns.
It would be great if you share some videos of that process.