If you read my previous post, you’ll remember I’ve been designing a digital mannequin with my CAD professional Simon with the purpose of designing corset patterns to then print out and use. We’ve initially made the mannequin to my proportions and Simon drafted a pattern I had sketched so we could check the fit. You can read it here.
Printing The CAD Corset Pattern
The first test was to have the pattern print correctly, we had some trouble converting it to illustrator so I could open it but after working that out it printed perfectly! Here it is all printed out on A4 paper with some bits made of two pages stuck together. I used the length of the back piece to determine it had printed correctly.
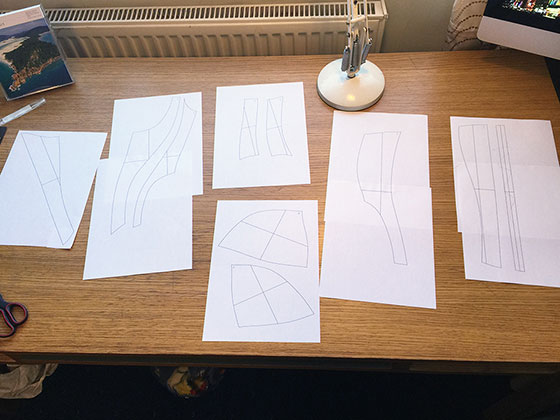
CAD Corset Pattern print out
Here’s a closeup of the pieces cut out –
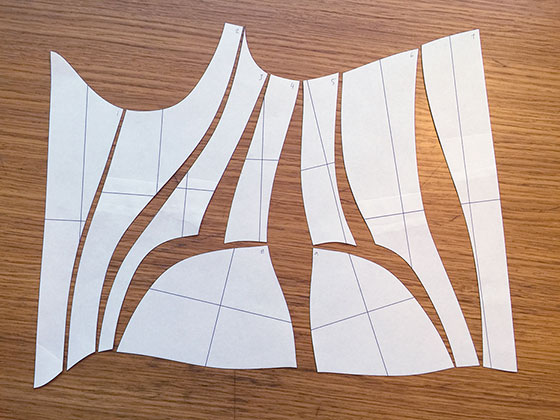
CAD Corset Pattern cut out
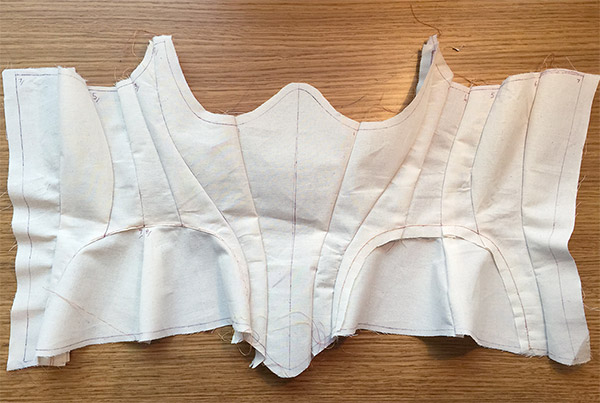
I then cut the muslin, stitched it and boned one side to assess fit –
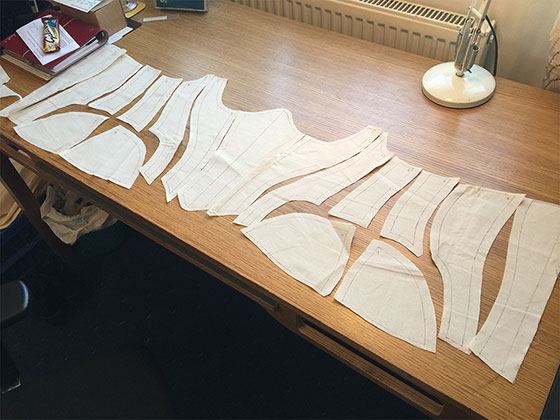
CAD Corset Pattern pieces

CAD Corset Pattern sewn together
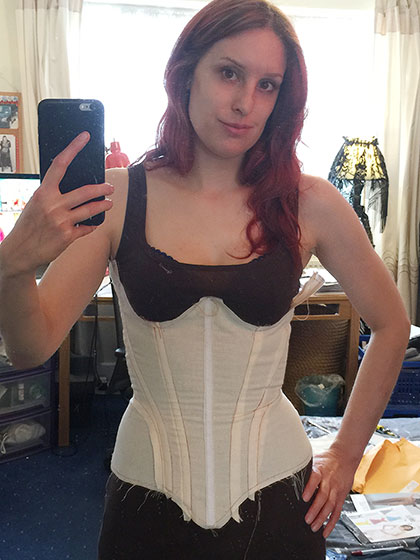
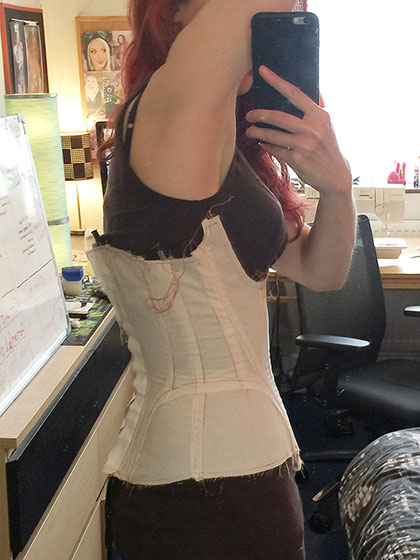
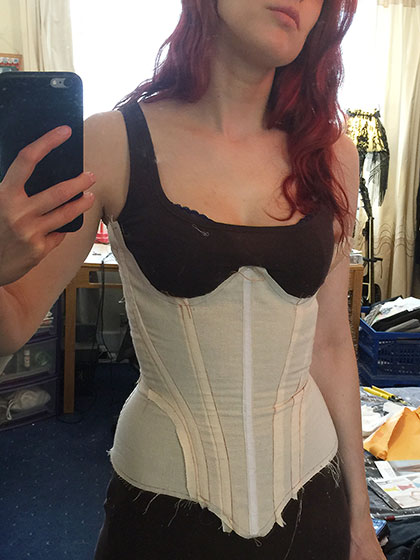
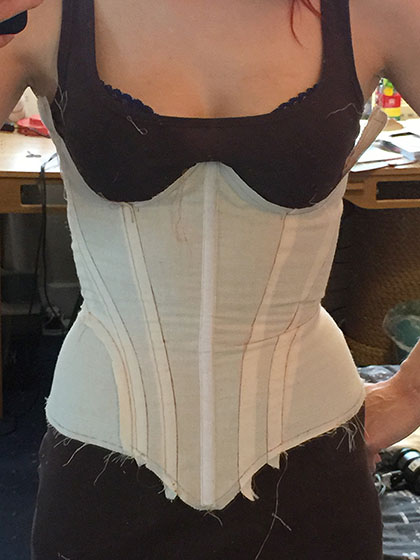
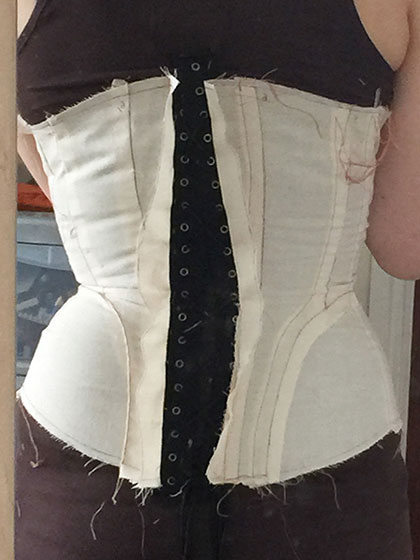
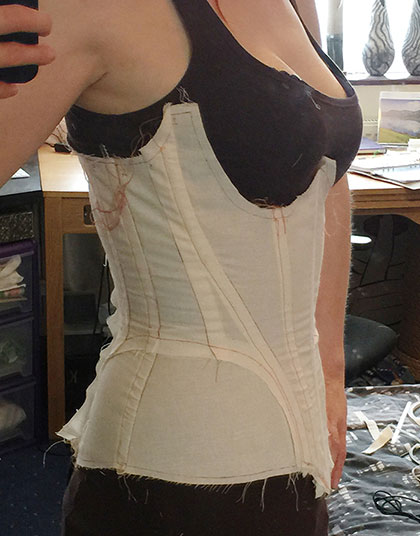
So without further ado here are quite a few images from various angles to give you a good idea of how well it fits. Excuse the messy background and my less than perfectly clean mirror, I was too excited to notice! I’ll give you my verdict on the fit below –

My Verdict On The CAD Corset Pattern

The pattern on the mannequin once finished by Simon — Click for bigger pic
So now I have visual references to assess in comparison to the corseted mannequin. I’ve not quite got the waist as small as I would like it, I think we can bring that in a fair bit on the mannequin as we also weren’t sure how much the ribs could be squished comfortably – digital mannequins of course don’t have ribs and so that area doesn’t respond like it has ribs behind it when you edit it 😀 Also the mockup fabric is a lot more stretchy than a finished corset would be but I want to get the waist closer to how I want it before making up a lined corset.
What I wasn’t expecting was how well it hugged my body, the fit is perfect and besides bringing in the waist, there is no need to alter the hips or width/shape anywhere else. For a first mockup of a pattern I’ve never had such a good fit, the curves are precisely shaped and so comfortable – it’s going to make drafting patterns so much easier! Much praise again to Simon for creating this amazing mannequin. I can’t wait to get started bringing in the waist further and perfecting the silhouette. Hopefully we’ll be able to work out the bust area too for the next mockup!

Print flattened surfaces generated by the command “Squish” in Rhino directly to printer is not a good idea. These surfaces have rough borders.
Some suggestions on using Rhinoceros to make sewing patterns:
1- Use the command “DupBorder” to duplicate the borders of a flattened surface, so you can delete that surface.
2- Use the command “EditPtOn” to see the points of curve generated in step 1, if there is a lot of points, you need to reduce them, use the command “Rebuid” to reduce the number of points of a curve or draw manually a new curve over the old one using the command “InterpCrv” and using the option “snap to points”.
3- Check the length of curves to see if they matches using the command “Length” and the command “Distance”.
4- Draw sewing allowances using the command “Offset”.
Best option to print patterns to multiple sheets of paper A4:
1- Export generated drawings from Rhino to format Adobe Illustrator “.ai”.
2- Open the generated file in step 1 in Corel Draw (not in Adobe Illustrator), print it using the option “Print tiled pages” and “Tiling marks”, scale factor: 100%.
3- In Corel you can print individual or group of drawings, and export it to PDF.
Hi Jeorane,
Thanks for the advice, we hit a brick wall with the pattern pieces getting distorted too much using squish so I’ll see if my Rhino guy can make it work with your suggestions. I must admit it still goes over my head when he explains stuff to me. I took a look at your site, your wedding dresses look amazing. Did you make them from scratch? I see you do alterations too so I wasn’t sure. Do you make corsets too?