Back pieces and lining pieces sewn together, ready for boning channels and eyelets.
A few days ago if you remember, I took the two front pieces and attached the busk, I then had only the back eyelet panels left to do before I could attach the front and back to the rest of the corset pattern.
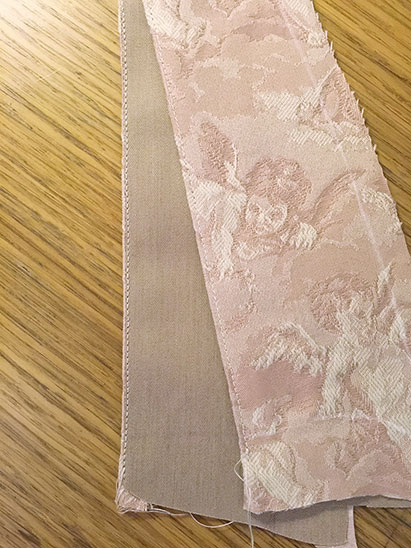
Here I’ve taken the back pattern pieces and their linings (remember I’m only lining the very back two pieces and front two pieces), sewn the outer and lining fabrics together and topstitched along the back edges. (These edges are where the eyelets go so you can lace the corset up at the back). The eyelets need to be set between two sprung steel bones which hold the edges straight.
Below shows my boning channels sewn with a gap in between for the eyelets. When you sew these lines of stitching always measure your bone and eyelet width to make sure you’re leaving enough room to fit them in. Below you can see my bones and eyelets just about fit, I like them snuggly but I have occasionally had trouble getting my bones in!
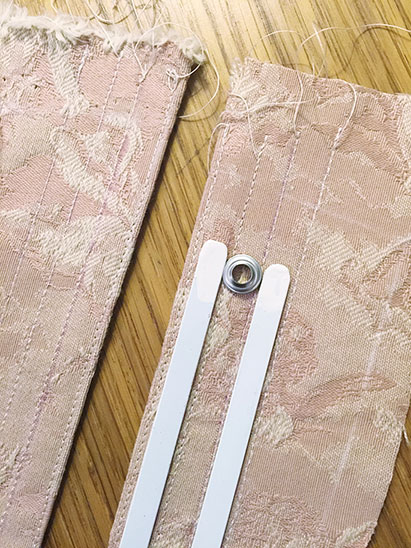
When you make a corset always use sprung steels at the back and sew the boning channels with enough room to get your eyelets in between.
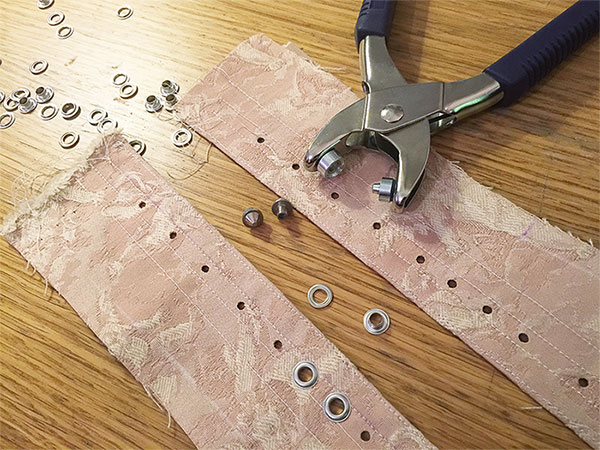
Next comes the measuring and positioning of the eyelets! When I make a corset I always start my eyelet positioning either side of the waist line. I like the four at the waist to be closer together for support even if it’s not a corset training corset I’m making. Then the others go in an inch to two inches apart depending on where the top and bottom-most eyelets will sit. If the corset pattern is slightly shorter or longer at the back for example, the end eyelets may sit too close to the binding, so I play with the distance between them until they sit nicely across the pattern piece. These are about an inch and a half apart.

With the busk done and the eyelets inserted, the corset pattern looks like this laid out. Now the lined pieces are treated as single layers and attached in the same way as all the other pieces were sewn together in this blog post – Corset Making – Pink Corset Part 1.
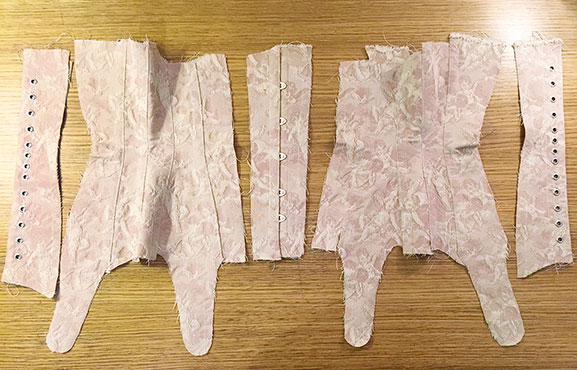
Corset Pattern ready to sew on the last four pieces
Below you can see the pieces go right sides together and get sewn along the seam line.
Note – I didn’t realise until after sewing the four pieces to the rest of the corset pattern, but the buckling of the fabric that you can see on the right below is the result of me not fusing the outer and lining layers together. You can do this by either using an iron-on double sided interfacing, or by just laying the piece flat, smoothing it out and sewing down the seam line (do this just inside the seam allowance so the stitching’s not visible once the corset is made).
I’ll see if I can flatten it out with an iron. Alas the next step calls for more bone casing and I’ve not got enough so I’m twiddling my thumbs until Mr Postman brings more supplies! Then we’ll have a fitting, promise!

Sewing the corset pattern together – back piece.