How To Roll Pin Corset Panels For External Bone Casing
Roll pinning is important for getting a smooth finish once the corset is pulled around the contours of the body. If you’re sandwiching multiple layers of fabric together and treating them as one, you’re going to need to roll pin if you don’t want wrinkles. If you don’t create an even tension between the fabric layers you’ll either get tension wrinkles where the fabric is pulled too tightly over the layer below, or wrinkles from excess fabric bunching up on top of a taught bottom layer.
Roll pinning is actually done in two different directions on the body/mannequin – up and down to follow the curves from hip to waist to bust but also around the body, so as well as curving in at the waist/out at the hips etc, each panel is slightly bowed outwards.
In addition, the seam allowance is also roll pinned, as sewing a seam and then pressing the seam allowances open, for example, creates a sharp bend in the fabric where it is pressed and thus a need for extra fabric on the outside layer of that bend.
People roll pin over various things; tailor’s hams, their leg, cushions, large tins even! But to mimic the shape of the body, the very best thing is the body itself, in its corseted shape. Not that you should lay the wearer down and ask them to slowly rotate for the next few hours! No, by body I mean the mannequin. But corseted mannequins are hard to come by so here’s the perfect solution, the corseted pillow!
If you already own a few corsets, you can just pick out the one that’s closest to the shape of the one you’re making. If it’s your first (well done for trying roll pinning straight off the bat!) or if you’re making a very different shaped corset, then use your mock up. Don’t tell me you didn’t make one, I will scowl at you and tut loudly before sending you off to make one. You should have made a mockup and boned at least half of it. Add bones to the other half (you’ll use them in the final corset so you’ll need them anyway), then put the mockup round a pillow and pin it together if you haven’t basted on some lacing panels at the back. Pull it about so it’s a good shape – roughly symmetrical and squashed slightly in the middle, and as we’re wider at the sides than front to back, oval rather than round. Once you’re happy with the shape you can begin.
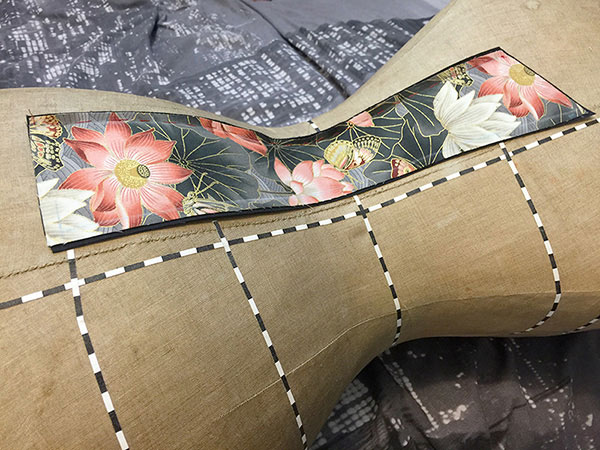
Take each panel in turn and place it on the part of the mannequin that correlates to the area of the body it will sit against. Line up the waist and make sure your fabric layers are also lined up on top of each other. Now stroke the panel from the waist line outwards, making sure the fabric is flat against the mannequin. Now starting at the waist, pin the panel down as shown above. Just angle the top of the pin outwards slightly and push it into the mannequin along the seam line, stroke and pin outwards from the waist.
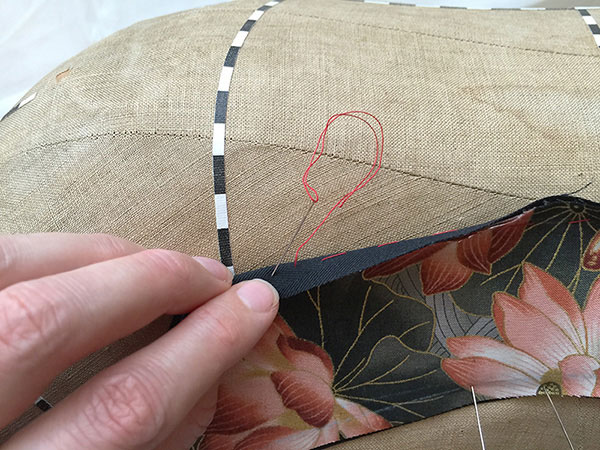
Your panel should be perfectly smooth against the contours of the mannequin. Now we’re going to roll the seams and stitch the fabric layers together.
As shown above, fold the seam allowance over in the direction it will be pressed (remember this is for external bone casing, we’ll cover internal in another article). Fold it flat along the seam line, take a needle and thread, and push the needle in and back out from above as close to the seam line as possible without being on top of the fold. Make sure you only go through the seam allowance and don’t end up sewing the panel and seam allowance together.
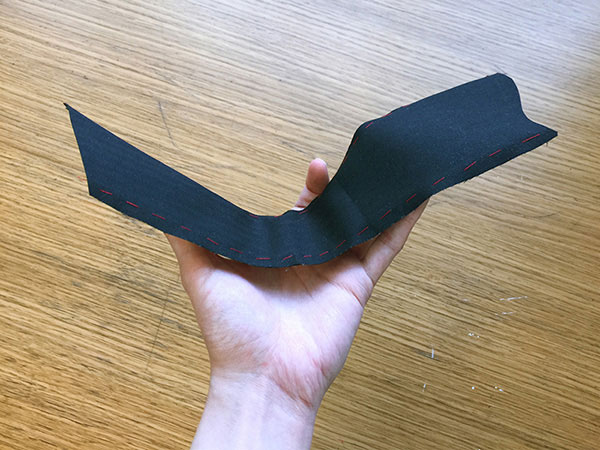
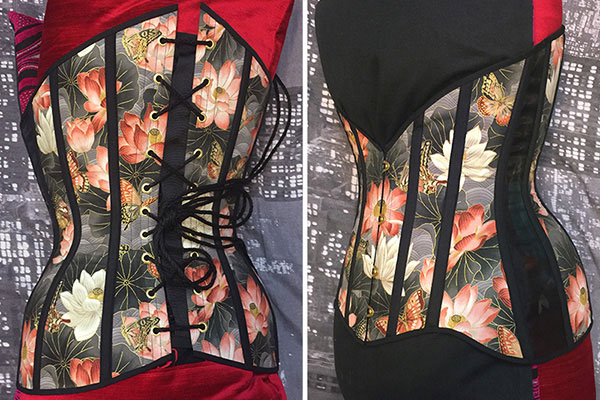
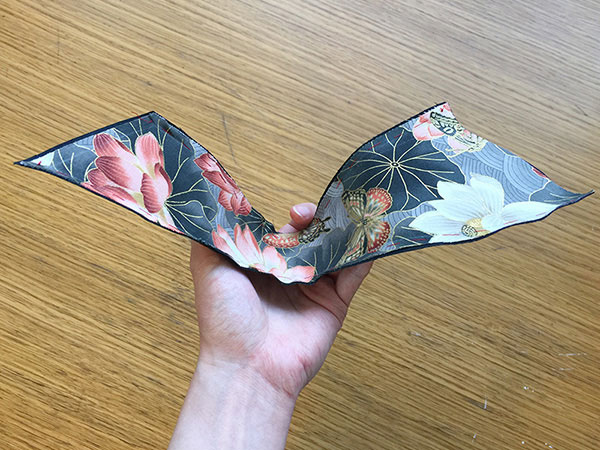
Now the panel is ready to be sewn. If you try to bend it the wrong way at the waist you’ll notice the inner fabric buckles (above) whereas holding it the correct way round (below), you can see the fabric layers sit smoothly. Your seam allowance may wrinkle up like mine here from the seam rolling.
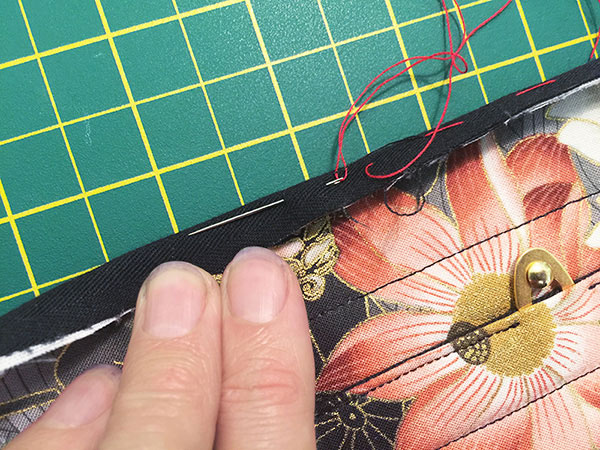
So what do you do with the busk and eyelet panels? Well the front of the corset is usually completely flat, even on this design with a slightly rounded tummy, I just inserted the busk flat then rolled the seam on a flat surface. I did stroke the fabric out from the waist line while on the flat surface just to make sure the outer fabric was taught there, to avoid any little waist wrinkles.

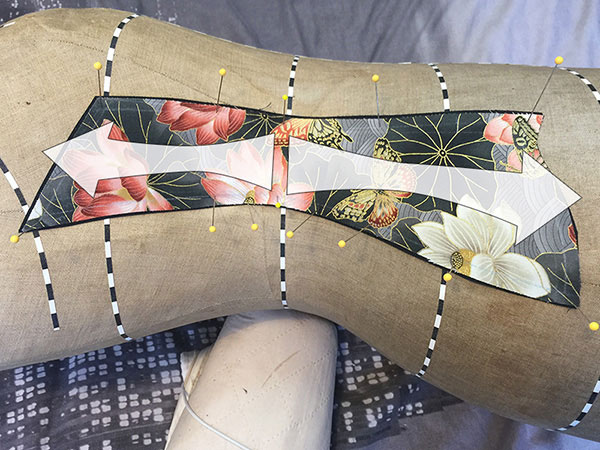
For the back; sew the back seam, turn the seam right sides out and lay on the mannequin. Stroke from the waist up and down the torso, then instead of being able to stitch the seam allowance you’ll need to stitch through the whole thing near the edge. I like to go from the waist, stroking as I stitch outward to the end, then return to the waist and stroke/stitch outward to the other end. You can then turn/sew the seam allowance on the other side of the panel in the normal way.
I’ll cover roll pinning for internal bone casing in the next issue but for anyone who wants some further reading on the subject, there’s a great free article on Foundations Revealed called Roll Pinning Techniques that covers more theory and handling tricky fabrics.