As promised I managed to dig out some photos of the three dimensional method of pattern drafting (as apposed to the 2D flat pattern drafting method we were discussing yesterday). I’m lucky enough to have an old school dress form thats a great starting shape for corset training corsets. I took the pattern in a little at the waist but it already has an unnaturally small waist so it was a great find – it was discarded in my art studio at university if you can believe that! I gave it a a loving home and a new lease of life. Keep meaning to cover it but it’s quite nice rough.
Anyway, moving on from my deep personal relationship with my dress forms! The pictures are pretty self explanatory – I started by marking the front centre and back centre then proceeded to drape material where I wanted pattern pieces and draw on, cut and pin in place on the dress form one by one. I then added marks to the corset pattern where the pieces joined so I could line the pieces up correctly when I joined them together. You also want to number your pattern pieces before unpinning, then transfer to paper, simples!
If you don’t have a dress form but do have a corset that you like the shape of then try stuffing it so it holds it’s shape, then using this as your mannequin. So now you know how, you can get cracking and design your own corset!
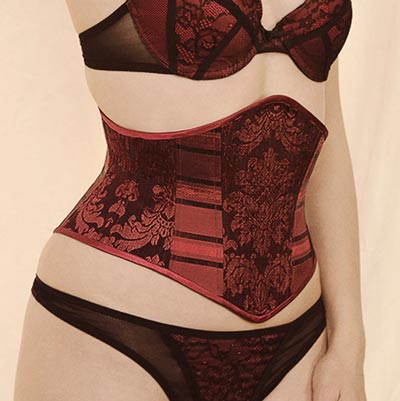
This is the Angel underbust corset pattern by the way so click to see the finished corset.